If you’re in the market for stamped brackets—whether for construction, automotive, or industrial applications—you know how critical their strength is. A bracket that fails under load can cause everything from minor project delays to dangerous structural issues. As a stamped brackets supplier, I’ve spent years working with engineers, contractors, and hobbyists who ask the same question: “How do I actually test the strength of a stamped bracket to make sure it’s going to hold up?” It’s not just about picking the thickest metal or the most prominent brand; it’s about practical, data-backed testing that aligns with real-world use cases. I’m here to break down those tests, how to perform them correctly, and what to look for when evaluating brackets—straight from someone who’s sold, tested, and delivered these parts for decades. Stamped Brackets
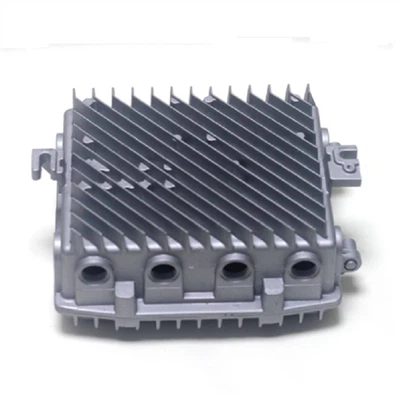
First, let’s set a quick baseline: stamped brackets are formed by pressing or stamping metal (usually steel, aluminum, or stainless steel) into angular shapes to connect two or more components. Their strength depends on a few key factors: the gauge of the metal, the quality of the stamping (no sharp burrs or uneven cuts), the design of the bracket (how the arms bend and distribute load), and the type of coating (if any, for corrosion resistance). All of these play into how a bracket will perform under pressure, so any strength test needs to account for both the bracket itself and its intended application.
The first and most accessible test for anyone—whether you’re a homeowner fixing a deck or a structural engineer designing a commercial building—is a visual and dimensional inspection. This might seem basic, but it’s the foundation of any strength assessment. A stamped bracket that’s been poorly manufactured will have uneven bends, metal that’s thinner in one spot than another, or cracks along the stamped edges. For example, if a bracket is supposed to have a 90-degree bend but one side is a full 10 degrees off, that misalignment means the load won’t be distributed evenly across the arms. Those uneven stresses will cause the bracket to fail prematurely, even if it looks sturdy at first glance. As a supplier, I’ve had customers send back brackets that looked great on the shelf but had hidden thin spots along the stamped beam—those show up on a caliper measurement, not just a visual check. I always recommend using a digital caliper to measure the metal thickness at several points along the bracket, and verifying that all bend angles match the design specifications. If a bracket’s minimum metal thickness is 14 gauge, don’t settle for anything less—even 0.01 inches thinner might seem trivial, but it cuts the load capacity by a noticeable amount.
Next up is a manual load test, which is perfect for testing brackets in a non-destructive way (meaning you can still use them after the test, if they pass). For this, you’ll need a set of weights, a sturdy workbench or frame to mount the bracket to, and a way to apply load to the bracket’s intended connection point. Let’s use a common example: a L-shaped angle bracket used to connect a 2×4 to a concrete wall. To test this, you’d mount one arm of the bracket securely to the wall (using the same number and size of screws you’d use in your actual application), then attach the 2×4 to the other arm. Start adding small weights—like 5-pound dumbbells or sandbags—to the end of the 2×4, gradually increasing the load. Watch for any signs of bending: if the bracket starts to bend more than 1/8 of an inch, that’s a red flag. For smaller brackets, a 50-pound load is a good starting point, while larger structural brackets should be tested up to their rated capacity (check the supplier’s specs, or for unrated brackets, test to 1.5 times the load you expect them to carry). I’ve seen customers skip this step and use a 10-pound bracket for a 50-pound load, only to have it bend and damage their project. The manual test might not give you exact load numbers, but it’s a quick way to compare two different brackets—if one starts bending at 30 pounds and the other holds 100 pounds easily, you know which is stronger.
If you need more precise data, a destructive load test is the way to go. This is the gold standard for suppliers and engineers, because it tells you exactly the maximum load a bracket can handle before breaking. To set this up, you’ll need a tensile tester or a hydraulic press—equipment many engineering shops have, but even small operations can partner with a local testing lab if they don’t have their own. Here’s how it works: you mount the bracket to a rigid test fixture, attach a force sensor to the point where the load will be applied, and slowly increase the force until the bracket fails. The sensor records the exact force at failure, which is the ultimate tensile strength (or ultimate load) of the bracket. For stamped brackets, failure can happen in a few ways: the metal might tear along a stamped edge, the bend might crack, or the entire bracket might pull away from the mounting surface. It’s important to test multiple samples from the same batch, because even consistent stamping can have minor variations—one bad sample might not represent the whole run. As a supplier, we test 5% of every batch of stamped brackets we ship, and keep records of those test results to share with customers. If a customer is working on a high-stakes project—like a bridge or a large commercial deck—they can request a full batch test, which includes every bracket’s individual failure load.
Another often-overlooked test is a corrosion resistance test. This might not seem directly related to strength, but rust or corrosion eats away at metal, reducing its thickness and strength over time. A bracket that passes a load test in dry conditions could fail in a year if it’s exposed to moisture or salt (like on a coastal deck or in a highway application). The easiest way to test corrosion resistance is a salt spray test, also called a neutral salt spray test (NSS), which is standardized by organizations like ASTM. You place the bracket in a chamber that sprays a fine mist of salt water, and leave it there for a set period—usually 48 hours, 72 hours, or longer. After the test, you inspect the bracket for rust, pitting, or coating damage. If there’s more than a small amount of surface rust, that means the coating isn’t sufficient for your application. For example, a zinc-plated bracket will hold up better in mild outdoor conditions, while a hot-dip galvanized or stainless steel bracket is necessary for coastal areas where salt air is common. I always advise customers to match the bracket’s corrosion resistance to their project’s environment—we offer a range of stamped brackets, from basic steel with a zinc coat to 316 stainless steel for marine use, and testing the corrosion resistance ensures you’re not choosing a bracket that will degrade before it’s meant to.
For brackets that will be exposed to dynamic loads—like brackets for car parts, conveyor systems, or bridge components—you’ll also want to do a fatigue test. This test simulates repeated loading and unloading, which can cause metal to weaken over time even if the maximum load is below the failure point. To perform a fatigue test, you use a machine that cycles the load on the bracket thousands or even millions of times, and track when the bracket finally fails. For example, a conveyor bracket might be cycled 10,000 times a day, so a fatigue test that runs for 1 million cycles ensures the bracket will hold up for years. I’ve seen customers use static-tested brackets for dynamic applications, only to have them crack after a few months—fatigue is a silent killer, so if your project involves moving parts or repeated stress, this test is non-negotiable.
Now, let’s talk about common mistakes people make when testing stamped bracket strength. The biggest one is not testing the bracket in its actual assembly. A bracket that’s strong when mounted to a steel beam might be weak when mounted to a 2×4 wood stud, because the wood can’t support the screws the same way. I once had a customer who tested a bracket mounted to a steel plate, gave it a clean bill of health, but then it failed when mounted to a wood deck—because the wood split at the screw holes. Always replicate your exact installation when testing, using the same fasteners, same material, and same spacing as you would in your final project. Another mistake is ignoring the bracket’s design: a gusseted bracket (with extra metal plates welded or stamped onto the main arm) will be stronger than a flat bracket of the same thickness, so you can’t just compare metal gauges without looking at the design. As a supplier, we design our brackets with gussets where needed to boost strength, and we always share load capacity data based on the bracket’s intended use case.
When you’re evaluating a stamped brackets supplier, don’t be afraid to ask for proof of these tests. A reputable supplier will have test reports for their products, and they’ll be transparent about the strength ratings, corrosion resistance, and fatigue performance of their brackets. If a supplier can’t provide that data, that’s a red flag—they might be cutting corners on stamping quality or metal thickness to save cost. We make our test reports available to all customers, and we even send physical samples for testing if a customer wants to run their own. Our team has been in the stamping industry for over 20 years, and we’ve built our business on delivering brackets that meet real engineering needs, not just look good on a shelf.
At the end of the day, testing stamped bracket strength is about matching the test to your application. If you’re a homeowner building a small shed, a visual inspection and a quick manual load test with a few hundred pounds is enough. If you’re a contractor working on a commercial deck, a destructive load test and a corrosion resistance test will give you the peace of mind that the brackets will hold. If you’re an engineer designing a bridge, you’ll need all of these tests plus fatigue testing to ensure safety over decades. No matter your project, taking the time to test (or verify test results from a trusted supplier) will save you from costly repairs, delays, or even safety hazards down the line.

We supply stamped brackets for every type of project, from small residential builds to large industrial structures. Our team works closely with customers to recommend the right bracket for their load, environment, and use case, and we can provide all the test data you need to confirm strength. If you’re ready to source stamped brackets for your next project, or you want more advice on testing their strength, get in touch with our team to discuss your specific needs. We’re here to help you make informed decisions and ensure your project is built to last.
Cnc Turned Parts References
ASTM B117, Standard Test Method for Salt Spray (Fog) Testing
ASTM A370, Standard Test Methods and Definitions for Mechanical Testing of Steel Products
Stamped Steel Fabrication, A Guide to Industrial Bracket Design and Performance, National Association of Metal Formers, 2021
Structural Fastener Testing and Evaluation, International Code Council, 2020
Hangzhou Zhalihui Import And Export Co., Ltd.
We are one of the most experienced stamped brackets manufacturers and suppliers in China, specialized in providing high quality customized products. Please feel free to buy discount stamped brackets in stock here from our factory. Contact us for quotation.
Address: Room 2801, Building 2, Taifu Plaza, No.17, Tonghui Middle Road, Chengxiang Street, Xiaoshan, Hangzhou, Zhejiang
E-mail: Chars_1979@hotmail.com
WebSite: https://www.zhalihui.com/
