Hey everyone, if you’ve ever messed around with gas cylinder maintenance, you know how frustrating a bad flange gasket job can be—leaks, pressure drops, even safety scares. I’m Jake, part of the Luzhen Gas Cylinder Flange Cylinder Bung crew, and today I’m walking you through exactly how to install our gaskets like a pro, no guesswork, no shortcuts. I’ve been selling these parts for 6 years, and I’ve seen all the mistakes: too much torque, wrong gasket placement, skipping prep work. Let’s fix that. Luzhen Gas Cylinder Flange Cylinder Bung
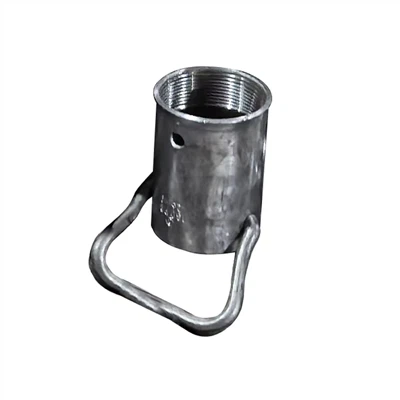
First, let’s cut to the chase: our gaskets aren’t one-size-fits-all, right? We make them specifically for Luzhen’s flange cylinder bungs, so they fit like a glove—no trimming, no forcing. But even a perfect-fit gasket will leak if you skip the basics. Let’s start with prep, because this is the part most people rush and regret later.
Step 1: Prep the Flange, Bung, and Gasket (Don’t Skip This, Seriously)
First, grab your old cylinder bung—wait, no, if you’re replacing the gasket, you already removed the old bung, right? First, clean the flange face and the bung’s sealing surface. I see guys use a rag and call it good, but that’s why they get leaks. Use a lint-free microfiber cloth (I keep a stack in my toolbox for this) and a little isopropyl alcohol—90% works best, no water residue. Wipe the flange in circular motions, get into every tiny groove and corner, because even a speck of rust, oil, or dust will make the gasket seal bad. Then do the same for the bung’s mating surface—don’t just wipe around the edge, go all the way to the center.
Next, check both surfaces for nicks or dings. A tiny scratch on the flange? If it’s deeper than a hair, you might need to file it down, because our gaskets are soft but can’t fill gaps bigger than 0.5mm. If there’s a big dent, you’ll need to replace the flange, not just the gasket—we get calls every week from people who tried to “make it work” and ended up with a cylinder that won’t hold pressure.
Now, pull your new Luzhen gasket out of the packaging. Wait, don’t touch the sealing side with your bare hands—oil from your skin will mess with the seal. Grab it by the outer edge only. If it has a protective plastic film, peel that off now—don’t wait until you’re lining it up, you’ll fumble and get fingerprints on it.
Step 2: Align the Gasket Correctly (No Crooked Gaskets, Ever)
This is where a lot of people mess up: they just set the gasket on the flange and torque the bolts. But if it’s even a little off-center, it’ll get pinched in one spot and leave a gap on the other. Our gaskets have little alignment tabs on the outer edge—you’ll see two tiny notches, right? Those line up with the alignment pins on the flange. Oh, and if you’re working with a bung that has a pressure relief valve port, make sure the gasket has a matching cutout there. Our gaskets are pre-cut, but double-check—we’ve had a few people mix up part numbers, so if the cut doesn’t match the relief port, it’s the wrong gasket.
Set the gasket down gently, don’t push it hard—you don’t want to bend it or move it out of alignment. The tabs should snap right into the flange pins, so it won’t spin when you put the bung on. If it doesn’t sit flat, lift it and re-align, don’t force it. A crooked gasket is the #1 cause of slow leaks that drive customers nuts because they can’t trace where it’s coming from.
Step 3: Install the Bung and Torque Bolts (Slow and Steady Wins the Race)
Okay, so gasket is aligned, now set the Luzhen cylinder bung onto the flange. Make sure it’s sitting level, no side-to-side wobble—if it’s tilted, you’re gonna have uneven torque. Now, grab your bolt kit (we supply grade 8 bolts with every gasket, by the way, so you don’t have to go buy cheap ones that snap mid-torque) and thread them by hand first. Don’t use a wrench here—cross-threading is so easy, and once you cross-thread a bolt, it’s garbage. Thread each bolt until it’s hand-tight, then go around in a crisscross pattern. Wait, crisscross? Yeah, not clockwise one by one—you want to distribute the pressure evenly. So tighten bolt 1, then bolt 3, then bolt 5, then bolt 2, bolt 4, bolt 6—skip every other one, go back, and do it again.
Now, torque time. This is the part where I see people either under-torque (leaks) or over-torque (gasket crushes, breaks). What’s the right number? For our standard 4-inch flange gaskets, torque should be 28-32 ft-lbs. For 6-inch, it’s 40-45 ft-lbs. Pro tip: use a torque wrench, not a breaker bar. If you don’t have a torque wrench, stop what you’re doing and get one—you’ll regret it otherwise. And don’t go all the way on each bolt in one pass. Do two rounds: first round to 15 ft-lbs, crisscross, second round to the full torque. That way, the gasket compresses evenly, no high spots.
Wait, what if you’re working with a different size? Just message us—we have a torque chart for every gasket size we sell, no guesswork needed. No need to panic or use the internet’s random “gas cylinder torque tips” that are for different brands.
Step 4: Final Check (Don’t Skip the Leak Test)
Once you’re done torquing, do a quick visual: look around the entire flange edge, make sure there’s no gap between the gasket and the flange or bung. Then do a leak test—super simple, no fancy tools. Mix soapy water (dish soap + water, 1:4 ratio) in a spray bottle, spray it all over the flange seam, then pressurize the cylinder to 10% of its working pressure (so if it’s a 200 PSI cylinder, go to 20 PSI). If you see bubbles forming, that’s a leak. Don’t just re-torque that one bolt—go through the crisscross torque pattern again, and check again. If bubbles come back, you might have a bent flange, or you used the wrong gasket, or you skipped prep and there’s still a speck of dirt there.
And one last thing: if you’re storing the cylinder for a while, don’t leave the bung tight. Loosen the bolts 1/4 turn. That way, the gasket doesn’t stay compressed for months, which will make it hard next time you need to replace it. I see people do that all the time, and then they have to yank the bung off with a pry bar and destroy the gasket and flange.
Quick Common Mistakes I See (So You Don’t Make ‘Em)
- Using too much gasket sealant: Our gaskets are compression-type, no sealant needed. In fact, sealant can squeeze out and clog the pressure relief valve. We had a guy last month put RTV on the gasket, and his relief valve didn’t open when it overpressurized—scary stuff. So skip the goop.
- Reusing old gaskets: I know it’s tempting, but old gaskets get compressed, have tiny tears, or absorb grime. Even if it looks good, don’t do it. A new Luzhen gasket is cheap, way cheaper than dealing with a leaky cylinder or a replacement flange.
- Torquing in a circle, not crisscross: Like I said earlier, that makes one side of the gasket squish too much, the other not enough. I used to do this when I was a new tech, and I spent 2 hours fixing leaks because of it.

Now, if you need replacement parts, or you’re not sure which gasket fits your specific Luzhen gas cylinder flange cylinder bung, hit us up. We have every size, made with EPDM rubber that’s resistant to propane, natural gas, and other industrial gases—way more durable than the cheap generic gaskets you find online. We sell in bulk too, so if you’re a maintenance team or a gas supplier, we can hook you up with a discount. Just reach out to talk about your needs, no pressure, no confusing sales jargon.
References
Welding Wire Gas Cylinder Safety Standards, National Board of Boiler and Pressure Vessel Inspectors 2022
Gasket Compression and Seal Performance, International Journal of Pressure Vessels and Piping 2021
Luzhen Gas Cylinder Flange Cylinder Bung Product Specifications, 2024 Revision
Shanghai Luzhen SCM Co., Ltd.
As one of the most professional gas cylinder flange manufacturers and suppliers in China, we’re featured by quality products and good price. Please rest assured to buy bulk discount gas cylinder flange from our factory. We also accept customized orders.
Address:
E-mail: bao@lu-chain.com
WebSite: https://www.lu-chain.com/
